I recently discovered Advanced Tomato, and I’m fairly confident that it is one of the best open source router firmware solutions in existence.Citation Needed
If you’ve ever tinkered with routers before, you know that an excellent way to upgrade your normal consumer grade router is to flash it’s firmware with something like DD-WRT, Tomato, OpenWRT, etc. If you didn’t know that - well you should now. Flashing your firmware gets you significantly more features; ability to block ads across your entire network, running a small web and/or database server, much more advanced controls for USB, Wireless and VPN configurations; the list goes on.
I’ve been a huge DD-WRT fan for quite some time, however I’ve found that more recently it’s been harder and harder to find versions of DD-WRT that were compatible with more recent router hardware. In this case my Netgear R7000. In fact the most recent DD-WRT version I found seemed a bit buggy, and didn’t improve the stability or performance of my router.
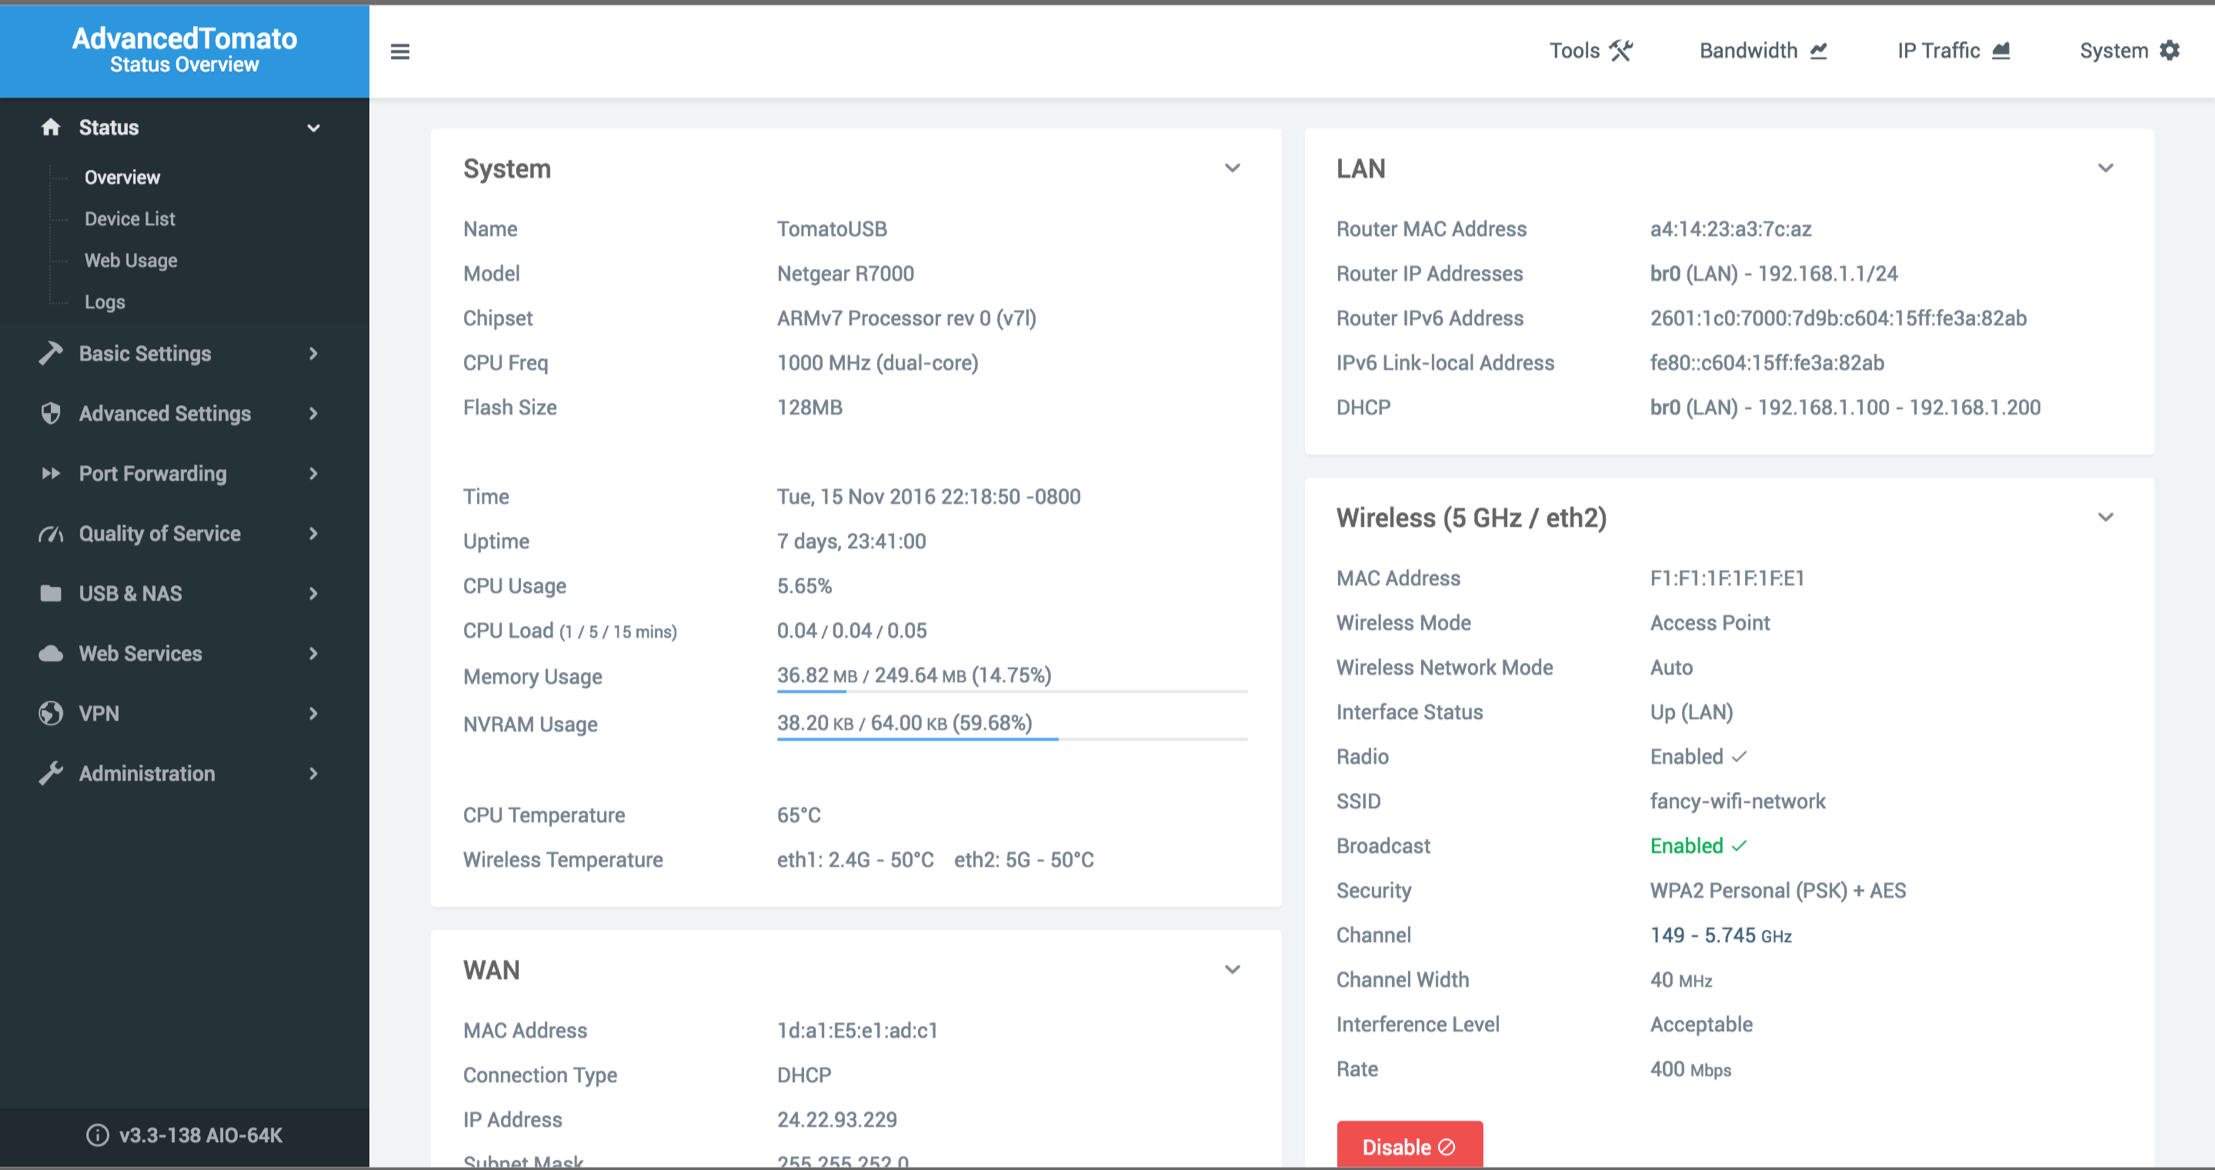 AdvancedTomato overview screen.
Wait, a beautiful modern looking router interface. I didn’t realize that existed until now.
I stumbled across AdvancedTomato while looking for other alternative firmwares, and let me tell you - it’s by far the best looking Web UI I’ve ever seen in a router. It also exposes all of the advanced features that are opened up by Tomato.
One of the features I really liked about the Netgear R7000 is that you could manually disable the LEDs on the top of the router. Since my router lives in my living room, it can be really annoying to have it flashing and blinking away all of the time.
So, I did some research on how to actually handle controlling the LEDs in an aftermarket firmware. Here’s what I’ve came up with so far.
You can SSH into the router and run these commands, or you can put them into your start up script on your router. If you have them run at start up the router will fix the lights every time it starts up. Effectively persisting these settings.
I found this blog post where other people had been talking about controlling the LEDs in my same situation. So I used this knowledge to configure my LEDs how I prefer them; with just the Power LED lit up white.
I’d encourage you to checkout AdvancedTomato and see how it works on your router. They do only seem to support more recent routers - likely from needing a bit of extra CPU power / storage for the web application.
# If you run this as a startup script, you'll need to sleep for a few seconds here because blink isn't running yet
sleep 10

# blink is what blinks the WLAN activity LEDs, it runs in the background - so kill it
killall blink

# Disable WAN and LAN LEDs
et robowr 0x0 0x18 0x1ff
et robowr 0x0 0x18 0x0
et robowr 0x0 0x1a 0x0

# disable WPS button LED
gpio disable 14

# disable WLAN button LED
gpio disable 15

# turn off 2.4GHz LED
gpio enable 13

# turn off 5GHz LED
gpio enable 12

# disable USB 2 LED
gpio enable 18

# disable USB 1 LED
gpio enable 17