Nginx is an excellent high performance web server, it tends to be my web server of choice for most things. It can handle reverse proxying to application servers with ease, it can load balance multiple applications, rewrite URLs, act as an HTTPS termination point, and just about anything else you’d want a web server to do.
So here we’re going to go over some common gotchas, or common configurations that you might want to implement.
How to serve up robots.txt directly from Nginx
Maybe you don’t want to worry about setting up a robots.txt file for some reason. Maybe you just want to disallow all URLs from being indexed. This is a somewhat contrived example, but it could be useful sometimes. I typically use this for staging or preview environments that we don’t want to be indexed by search engines.
# NOTE: The location directive should be used within a server block
location = /robots.txt { try_files $uri @robots_txt; }
location @robots_txt { return 200 "User-agent: * \nDisallow: /\n"; }
How To redirect www.example.com to example.com
This is a good practice to get in the habit of, forcing your users to a specific URL of your site - either www.adamrunner.com or adamrunner.com. I preferred adamrunner.com for the URL of my website. This small server block will redirect any visitors from the www to the non-www version. A prerequisite for this is that you have the appropriate A or AAAA records defined with your hosting provider.
If you would prefer the www version of your URL, you’ll just want to switch them in the example below. This code listens on www.adamrunner.com and redirects it to adamrunner.com. It uses a 301 redirect, which is a “permanent” redirect.
server {
  listen 80;
  listen [::]:80;
  server_name www.adamrunner.com;
  return 301 $scheme://adamrunner.com$request_uri;
}
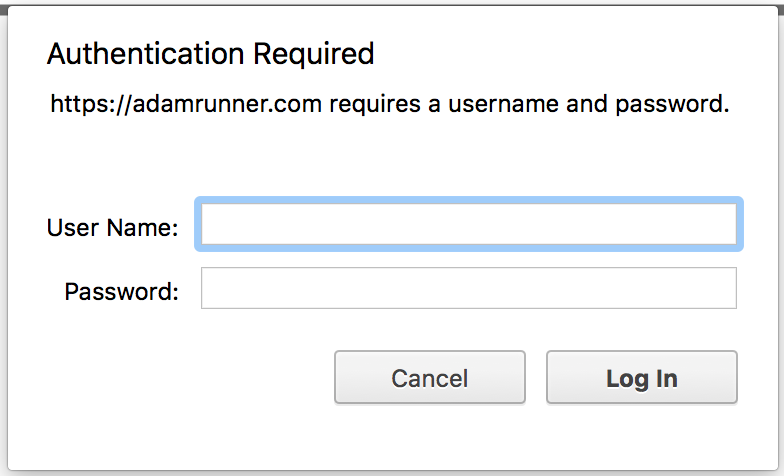
How to Use Basic Authentication in Nginx
If you’re serving up a resource that you want to limit the access to, one of the easiest ways is to use basic authentication. As the name implies, it’s very basic. It’s also very quick and easy to get up and running.
It’s worth noting that you should use Basic Authentication in conjunction with HTTPS; otherwise your passwords will be submitted in plain-text to the web server, and that is a Very Bad Thing ™.
location /restricted {
  satisfy any;
  deny all;
  auth_basic "Restricted"; # Just the title of the dialog box that pops up, you can make this more descriptive.
  auth_basic_user_file /etc/nginx/.htpasswd; # You'll need to generate this file, I'll show you how.
  # These two lines are optional, but I'd recommend logging any access to your restricted URL.
  access_log /var/log/nginx/restricted.log;
  error_log /var/log/nginx/restricted-error.log;
}
Before this will work, you’ll need to generate a .htaccess file that contains the username and encrypted password that you would like to use.
cd ~
printf "MYUSERNAME:$(openssl passwd -crypt MYPASSWORD)\n" >> .htpasswd
sudo mv .htpasswd /etc/nginx/
sudo chmod 444 /etc/nginx/.htpasswd
These commands will generate an encrypted version of the password MYPASSWORD, it then outputs it to the .htpasswd file (along with the username MYUSERNAME).
It also appends it to the .htpasswd file, allowing you to append different credentials in there if you would like.
Lastly, we move the file to /etc/nginx/.htpasswd (which is the location specified in our Nginx configuration block) - and then chmod the file so it can only be read, and not written to.
After restarting Nginx sudo service nginx restart when you attempt to access the restricted URL in your browser, you’ll end up with an authentication prompt.
How To Redirect HTTP to HTTPS
We already know that using HTTPS is one of the most important things you can do for your website. In this example we’ll redirect any users who happen to land on the non-secure URL to the secure URL. So all users end up connecting to your website via HTTPS.
server {
  listen 80;
  listen [::]:80;
  server_name adamrunner.com;
  return 301 https://adamrunner.com$request_uri;
}
How To Enable Browser Caching for assets
Typically I use this snippet or something similar for Rails applications, in theory you could use this for just about any web application. However the reason that it works best for Rails applications is that the asset pipeline generates fingerprinted filenames specifically to bust through the browser cache. If you implement this rule with another application framework, ensure that your assets have fingerprinted filenames, or you might not see the assets update in the browser when they change.
location ~* \.(gif|jpg|jpeg|png|ico|woff|js|css|svg)$ {
        expires modified +72h;
        access_log off;
}
How To 301 (permanent) Redirect for URLs in Nginx
Whenever changing the URL structure of a website, it’s always a great idea (for SEO purposes) to redirect any of the old URLs to their new version (provided that it exists in the new version of the site).
The first example will allow us to redirect any requests to the old gallery.php to the new URL /gallery/. We’re also capturing the argument that is normally passed to gallery.php to use in the redirect. The old requests would go to example.com/gallery.php?category=gallery_name, It would be redirected to /gallery/gallery_name.
The second example will allow us to redirect any other simple URLs without any parameters. It’s a fairly simple directive, the old URL is the first param, the new URL is the second param. The third param in both examples is permanent; this instructs Nginx to use a 301 redirect - this helps inform any search engines the the page has been permanently moved.
rewrite ^/gallery.php /gallery/$arg_category? permanent;
rewrite ^/about_us.html /pages/about_us permanent;
How To Use Nginx to reverse proxy to ElasticSearch
The web server that is included with ElasticSearch is fairly basic, to add features like keep alive, to deny access to specific endpoint or to easily enable HTTPS support you can use Nginx as a reverse proxy to the actual ElasticSearch server.
#NOTE: Redirect to HTTPS
upstream elasticsearch {
    server localhost:9200;
}
server {
        listen 80;
        # NOTE: Comment out the following line if ipv6 is not supported
        listen [::]:80;
        server_name es.adamrunner.com;
        return 301 https://es.adamrunner.com$request_uri;
}

server {
    listen 443 ssl;
    #NOTE: Comment out following line if ipv6 is not supported
    listen [::]:443 ssl;
    ssl on;
    ssl_certificate /etc/letsencrypt/live/es.adamrunner.com/fullchain.pem;
    ssl_certificate_key /etc/letsencrypt/live/es.adamrunner.com/privkey.pem;
    ssl_protocols       TLSv1 TLSv1.1 TLSv1.2;
    server_name es.adamrunner.com;

    error_log   /var/log/nginx/elasticsearch-errors.log;
    access_log  /var/log/nginx/elasticsearch.log;
    location / {
        proxy_pass http://elasticsearch;
        proxy_redirect off;
        proxy_http_version 1.1;
        proxy_set_header X-Real-IP $remote_addr;
        proxy_set_header X-Forwarded-For $proxy_add_x_forwarded_for;
        proxy_set_header Host $http_host;
        add_header 'Access-Control-Allow-Origin' 'adamrunner.com' always;
        add_header 'Access-Control-Allow-Methods' 'GET, POST, OPTIONS' always;
        add_header 'Access-Control-Allow-Headers' 'DNT,X-CustomHeader,Keep-Alive,User-Agent,X-Requested-With,If-Modified-Since,Cache-Control,Content-Type' always;
    }

}
There’s a bit more going on in this configuration file than there have been in the other examples. But lets break it down piece by piece.
The first section is the upstream definition. This isn’t explicitly required, but when reverse proxying to application servers it allows you to manage the definition of your upstream server in a specific place. It also allows you to define multiple servers in the upstream, which would effectively load balance the upstream servers with round-robin.
The first server block just redirects any requests over HTTP to HTTPS, there are a couple other examples of this on this page.
The second server block is where the magic happens. First, we listen on SSL, fairly straight forward. Pointing to the certificates and keys that are present on the system. In this example I’m using keys and certificates that were signed using Lets Encrypt.
In the location block, we use some different directives to define the behavior so that Nginx passes all of the traffic to a different server. In this case we use the proxy_pass directive to send the traffic to our upstream that was defined earlier. Next we tell Nginx to not to redirect from the proxy, and we set the HTTP version.
After that we’ll set some headers that are a bit of a good practice. These proxy_set_header directives can make troubleshooting a bit easier.
Lastly, and possibly most importantly (if you’re accessing the server via AJAX / Javascript) we configure the CORS headers. These headers tell the web browser to allow access from one domain to another, in this case we’re using it to access es.adamrunner.com from adamrunner.com. The always param instructs Nginx to always add the header, this makes troubleshooting easier by ensuring that the headers are added, even if the proxied server returns an error. This feature was added in Nginx 1.10, so you’ll need to verify that you’re running a supported version of Nginx to use the feature.
How To Use Nginx to reverse proxy to PHP-FPM
One of the most common configurations that Nginx is used for is reverse proxying to a PHP application, running in PHP-FPM.
location ~ \.php$ {
      fastcgi_split_path_info ^(.+\.php)(/.+)$;

      # With php5-fpm:
      fastcgi_pass unix:/var/run/php5-fpm.sock;
      fastcgi_index index.php;
      include fastcgi_params;
    }
This location block is fairly simple, we look for any requests ending in .php and then using the fastcgi extensions, pass them to the FPM server running on a unix socket at /var/run/php5-fpm.sock. The location of this socket will be defined in your PHP FPM configuration. This configuration also assuems that there is a fastcgi_params file present in your nginx configuration directory. (Usually /etc/nginx, it should be provided by your Nginx configuration.)
Upgrade Nginx to the latest version on Ubuntu 14.04
The default Nginx package that is available in Ubuntu 14.04 is fairly out of date, and doesn’t have access to many of the newer features that have been added to later versions of Nginx.
Fortunately Nginx provides packages for most Linux distributions. Here’s how to install the latest version of Nginx. First you’ll need to add the Nginx signing key.
$ sudo wget http://nginx.org/keys/nginx_signing.key
$ sudo apt-key add nginx_signing.key
After importing the key, we’ll need to add the new Nginx sources. We can do this by creating the file /etc/apt/sources.list.d/nginx.list and filling it with these lines.
deb http://nginx.org/packages/ubuntu/ trusty nginx
deb-src http://nginx.org/packages/ubuntu/ trusty nginx
Next since we updated the sources, we’ll need to update the list of possible packages. Using this command: sudo apt-get update -y
Finally, we’ll want to remove any version of Nginx that was installed, and install the new version.
$ sudo apt-get remove nginx-common
$ sudo apt-get update
$ sudo apt-get install nginx
Then we’ll check and see if the installation was successful.
$ nginx -v
nginx version: nginx/1.10.2
Congrats, you’ve updated to the latest version of Nginx!