This post is about some of the steps that I take when configuring a virtual or physical server and connecting it to the internet. We’re just configuring a server for “general” use. Originally this post was about setting up a server for ElasticSearch, but I found it reasonable to generalize the first steps. So this server could be the foundation for just about any server. ElasticSearch, Ruby on Rails, NodeJS, MySQL, PostgreSQL, etc. feel free to use this as a guide to setting up the scaffolding for your server. I’m also going to be using DigitalOcean because I really like their service, and I use several different DigitalOcean servers to host various production applications.
Why DigitalOcean?
- It’s cheap. They’ve got servers starting out at $5/mo.
- It’s fast. Their provisioning process is very quick, even the smallest server seems performant, and they provide plenty of bandwidth.
- It’s simple. The control panel is very easy to navigate and use.
- They’ve got a great community, and they contribute to open source.
- You can try it for free.
Setup that environment.
If you’re interested in following along on DigitalOcean, you can sign up using my referral link, and you’ll get $10 of credit. That’s enough to run a server for two months! (or for a few hours if you pick a giant instance).
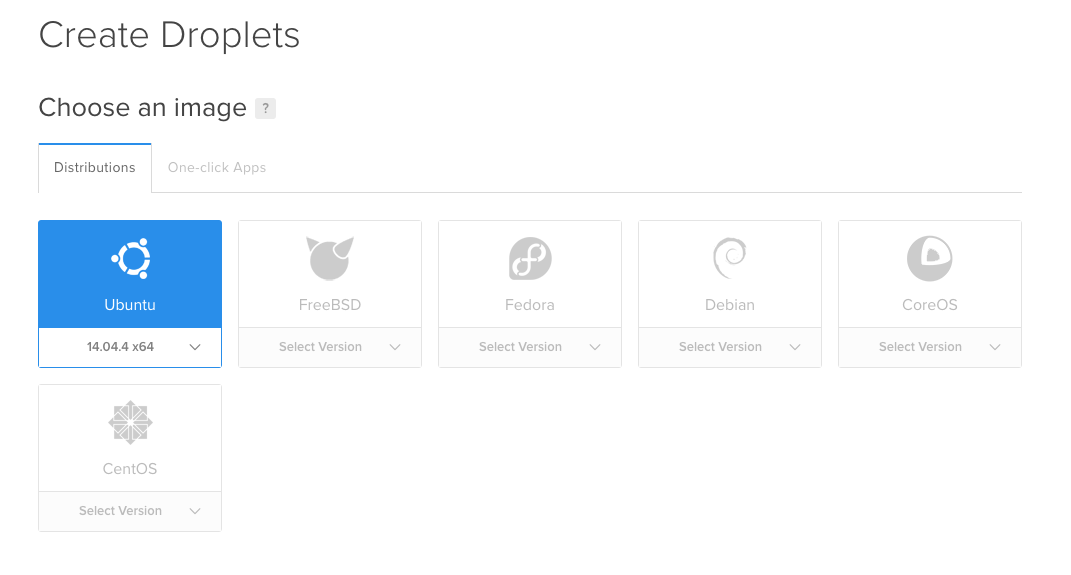
We’re going to start on the “Create Droplet” screen at DigitalOcean. At this screen you’ll choose the operating system that you want to run on your server. I’m partial to Ubuntu, so that’s what I’m going to choose here.
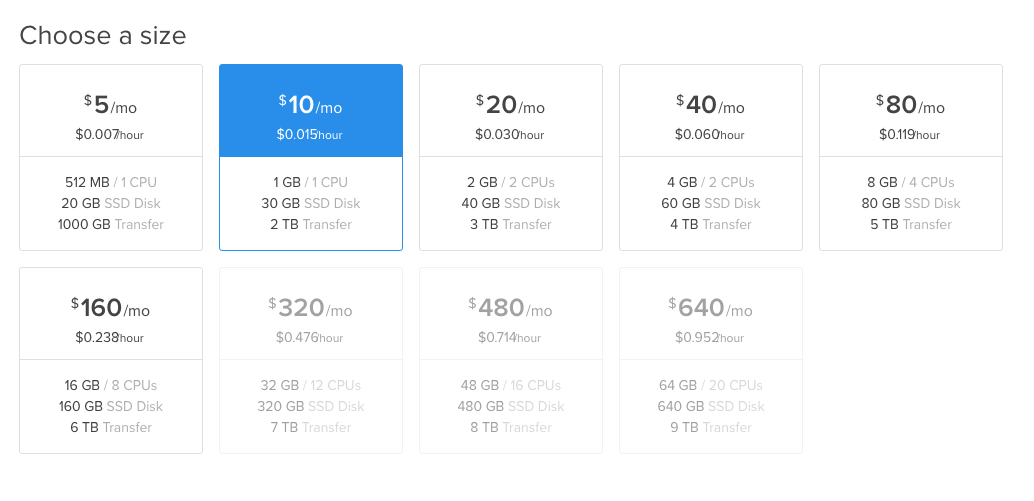
Next we’re going to choose a size for our droplet, in theory just about any size would work however it depends on what you’re going to be running, and how many users you expect to serve off of the box; I usually do at least a 1GB box. For some applications I’ll choose an even larger box. Do note that you can upgrade the performance and size of your droplet later. So don’t be too scared about choosing something too small.
Choosing a datacenter region. You’ll want to choose whichever location is closest to you or your users geographically, in my case it’s the San Francisco datacenter.

Just a couple of other things. The final couple of steps you’ll want to select IPv6 and enable it (I suppose you don’t have to but it seems silly not to) and you’ll also want to import your SSH key! This part is very important! You shouldn’t use password authentication for SSH, pretty much ever. SSH Keys are much more secure and much easier to deal with. I mean who likes passwords anyways?
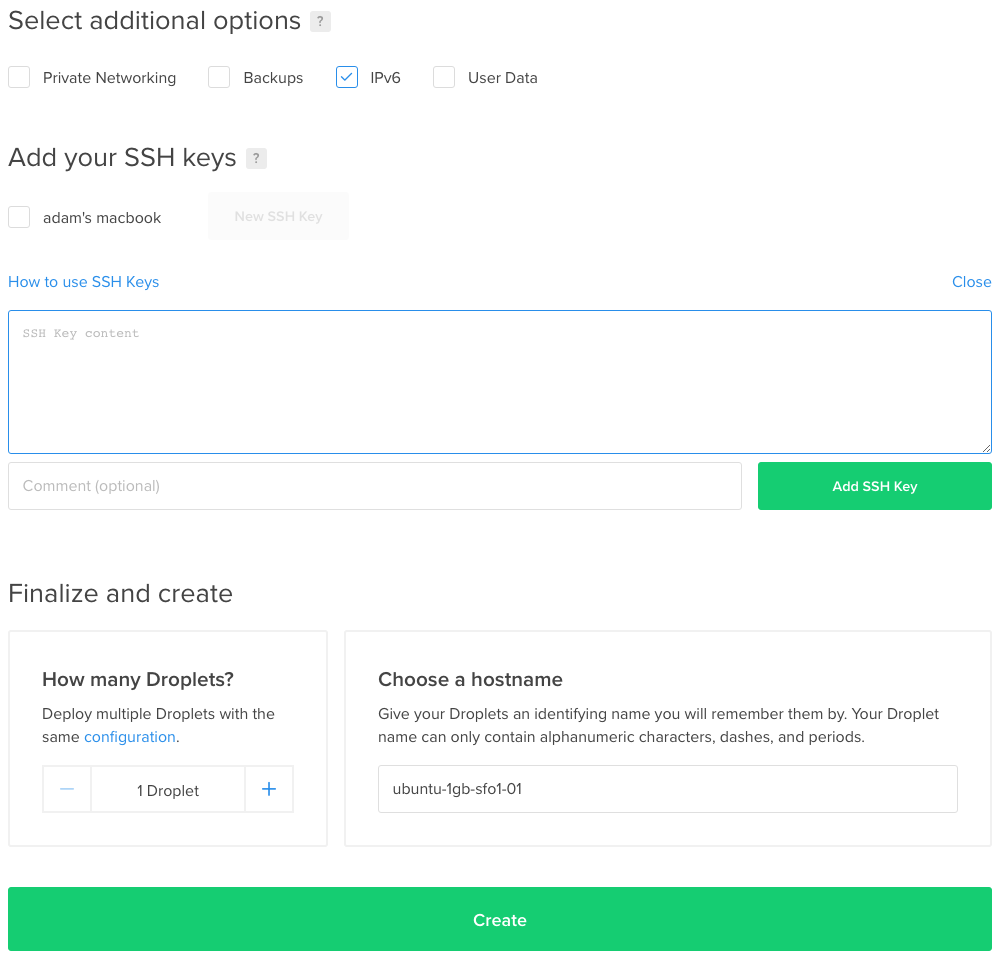
You’ll want to copy your public SSH key and paste it into the box. Give it a name, and then click the green “Add SSH Key” button. Use the command cat ~/.ssh/id_rsa.pub to view your public SSH key, select it and copy it (without any extra spaces).
cat ~/.ssh/id_rsa.pub
ssh-rsa BB3NzaC1yRur7QWFTFoMzSKc2EAAAADAQABAAABAQCZLgtS9GHJ5vdXDcpTOOy2FsIXMYO8F29aot5eYJz2pTrZsBhrKLrq8kzkck9rGXHi8p5r//kZ7FLhj5nglI7DXaaBBn7lQceF7pQtRdkFiCxKzPFdJ+ilklt+1WSzhAZngcs0+NKv64Kt92BfPXnM+AIqQDaMXBdHTevUQ39h9No0WYNd902e1hyZkn6zURvz3U1oMuqXP5MLpMAqQXWXmt5RgxygYfOWDUbIcTRapb7IZDQ5SCQGvBZ59cq+n9 [email protected]
Choose a hostname: This hostname is (I believe) just for your machine locally / on your account. You should just be able to put whatever you want here.
Create it! Click the button and watch it do it’s thing, you should get an email when it’s all up and running, then we’ll log in, and lock it down a bit.
Logging In And “Locking It Down”
The next thing we’re going to need to do is change some of the defaults for how the Ubuntu server is configured. When you spin up a droplet at DigitalOcean with an SSH key, there is only 1 user on the machine and it’s the root account. We want to create a normal user and add sudo privileges for that user.
First we’ll connect to our server as root. Using this command ssh root@my_server_ip. Since we’ve already supplied our public key to the server, there shouldn’t be any other credentials needed to log in.
After this we’ll want to create a new normal user, and then add it to the “sudo” group. Allowing the account to perform privileged actions with a password. We’ll also copy the authorized_keys file from the root user, so we don’t have to mess with any pesky passwords. We’ll fix the owner on the file, and then lastly we’ll set a password for our user, this password will be the one that we’re prompted for when running sudo actions.
You’ll need to replace your_user_name with whatever username you want to use. If you don’t know your droplet’s IP address you can check in your DigitalOcean control panel.
$ ssh root@my_server_ip
root@ubuntu:~# adduser your_user_name
...
root@ubuntu:~# adduser your_user_name sudo
root@ubuntu:~# mkdir -p /home/your_user_name/.ssh/
root@ubuntu:~# cp ~/.ssh/authorized_keys /home/your_user_name/.ssh/
root@ubuntu:~# chown your_user_name:your_user_name -R /home/your_user_name/.ssh
root@ubuntu:~# passwd your_user_name
root@ubuntu:~# exit
There are several more “hardening” steps that you can take at this point. I usually do this:
- Edit the file
/etc/ssh/sshd_configchangePasswordAuthentication yestoPasswordAuthentication no. This will require that you authenticate via public keys. You’ll still need to use your password forsudo, this should block the majority of dictionary / password attacks against your server. - Also in
/etc/ssh/sshd_configyou can adjust the port that SSH is listening on, this will help prevent some brute force attacks. But it’s also annoying to remember a non-default port. I typically do not do this, since an attacker is just a port scan away from determining where your SSH server is running. - Install
fail2ban, an authentication log parser / IP address banner. It scans the log files that SSH (and many other services) use and then uses IP Tables to ban IP addresses that are spamming your server with failed logins.sudo apt-get install fail2banthe default configuration will ban an IP for 5 minutes after failing to login 3 times in a 3 minute period. You can reconfigure these values by editing/etc/fail2ban/jail.local, here are some values that I use on my servers.
#/etc/fail2ban/jail.local
[DEFAULT]

# "ignoreip" can be an IP address, a CIDR mask or a DNS host. Fail2ban will not
# ban a host which matches an address in this list. Several addresses can be
# defined using space separator.
ignoreip = 127.0.0.1/8 192.168.1.1/24

# "bantime" is the number of seconds that a host is banned.
bantime  = 600000

# A host is banned if it has generated "maxretry" during the last "findtime"
# seconds.
findtime = 60000
maxretry = 3
You’re all set! Now you’ve got a Ubuntu server up and running on DigitalOcean! You can use this server to host a VPN, a website, a database, a search engine, whatever you want! The sky is the limit!